Introduction to reproducible data analysis with R and Quarto - Day II
KLI Seminar 2023
Packages and package dependecies

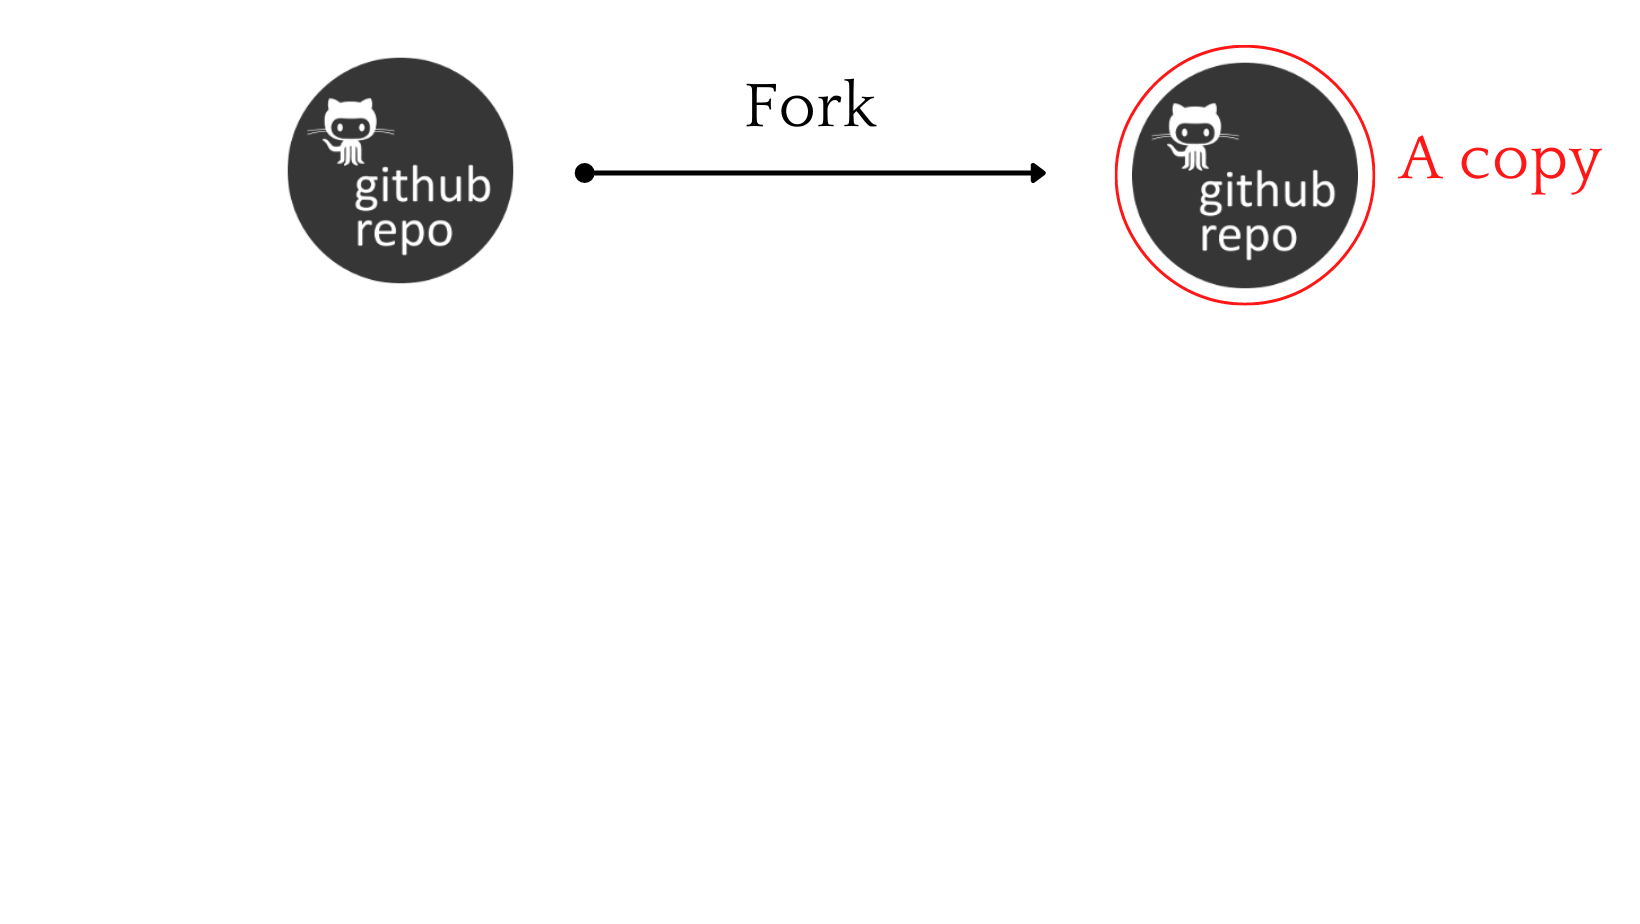
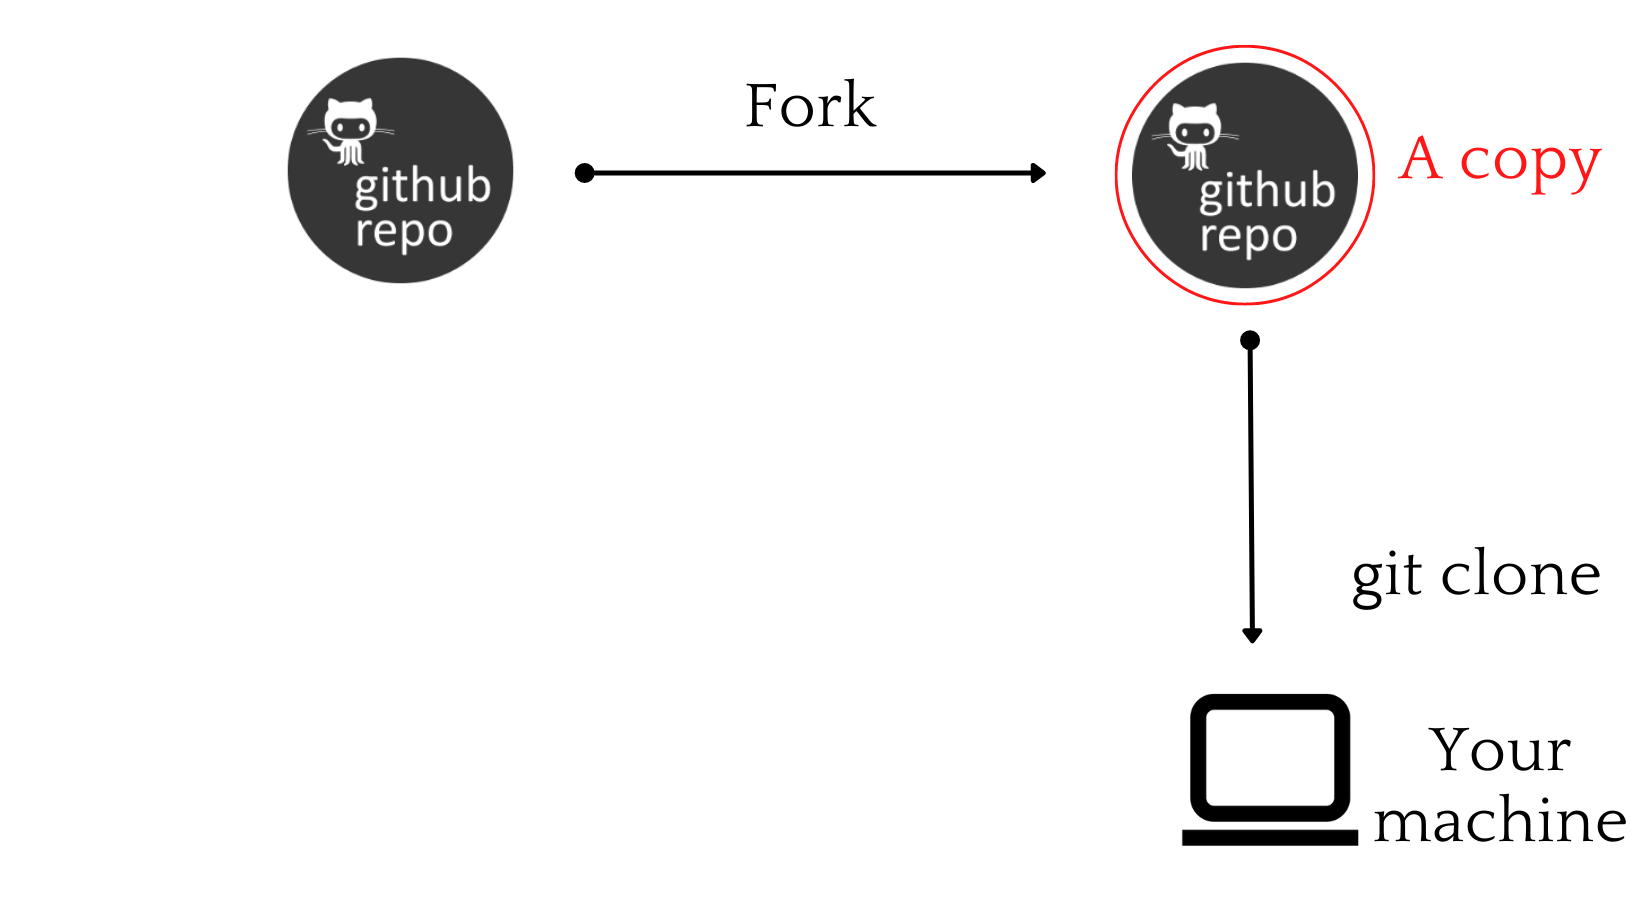
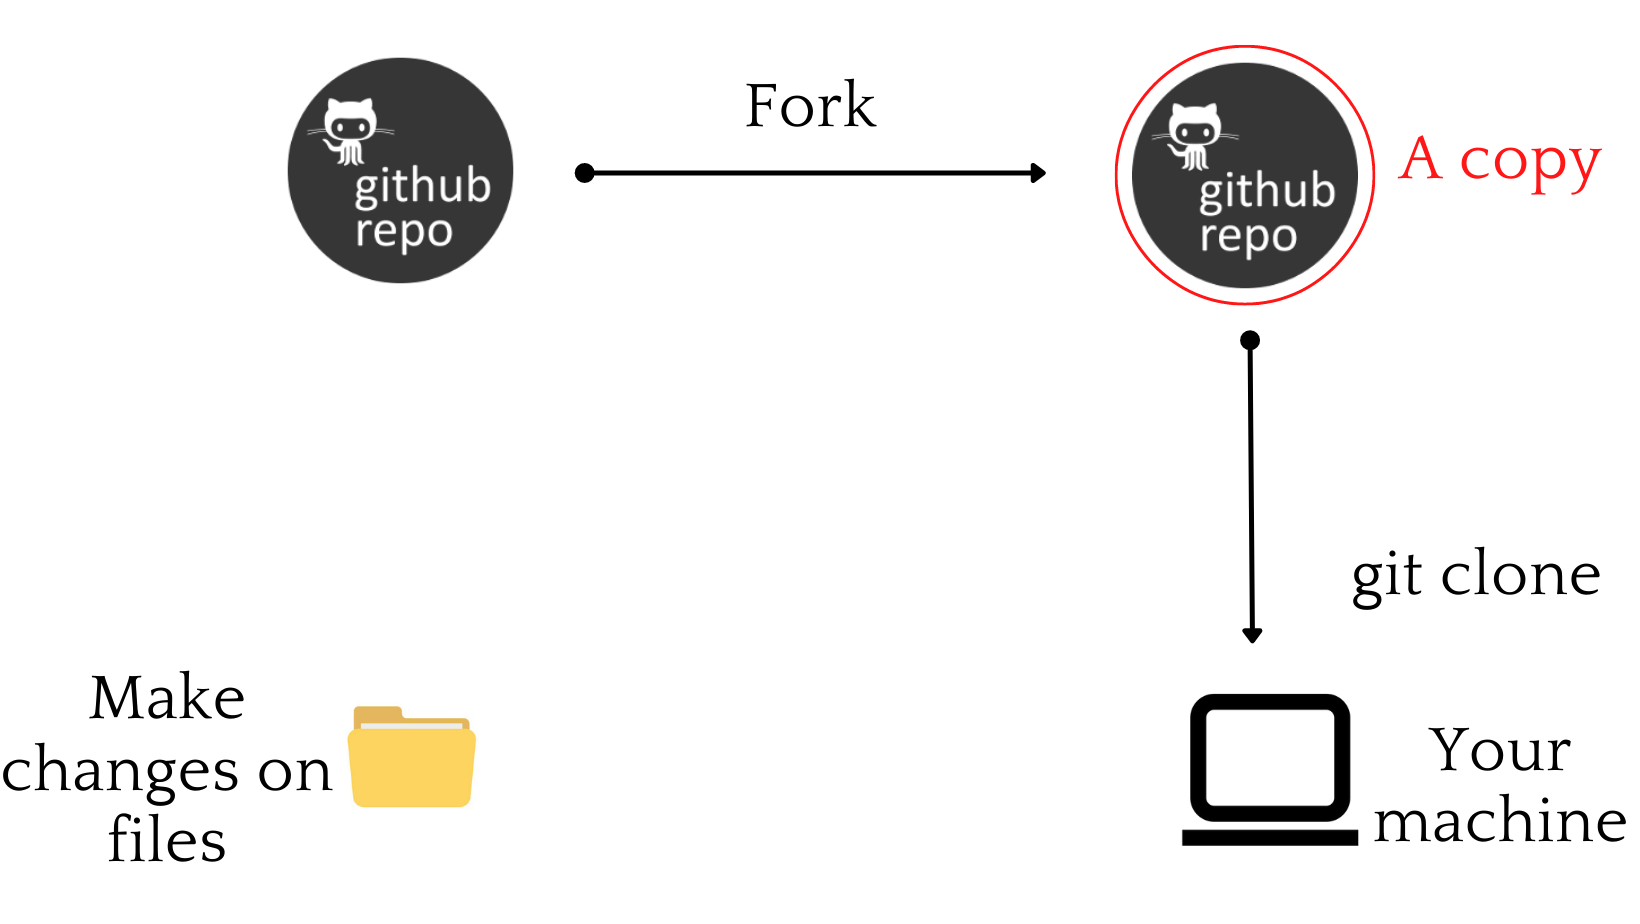
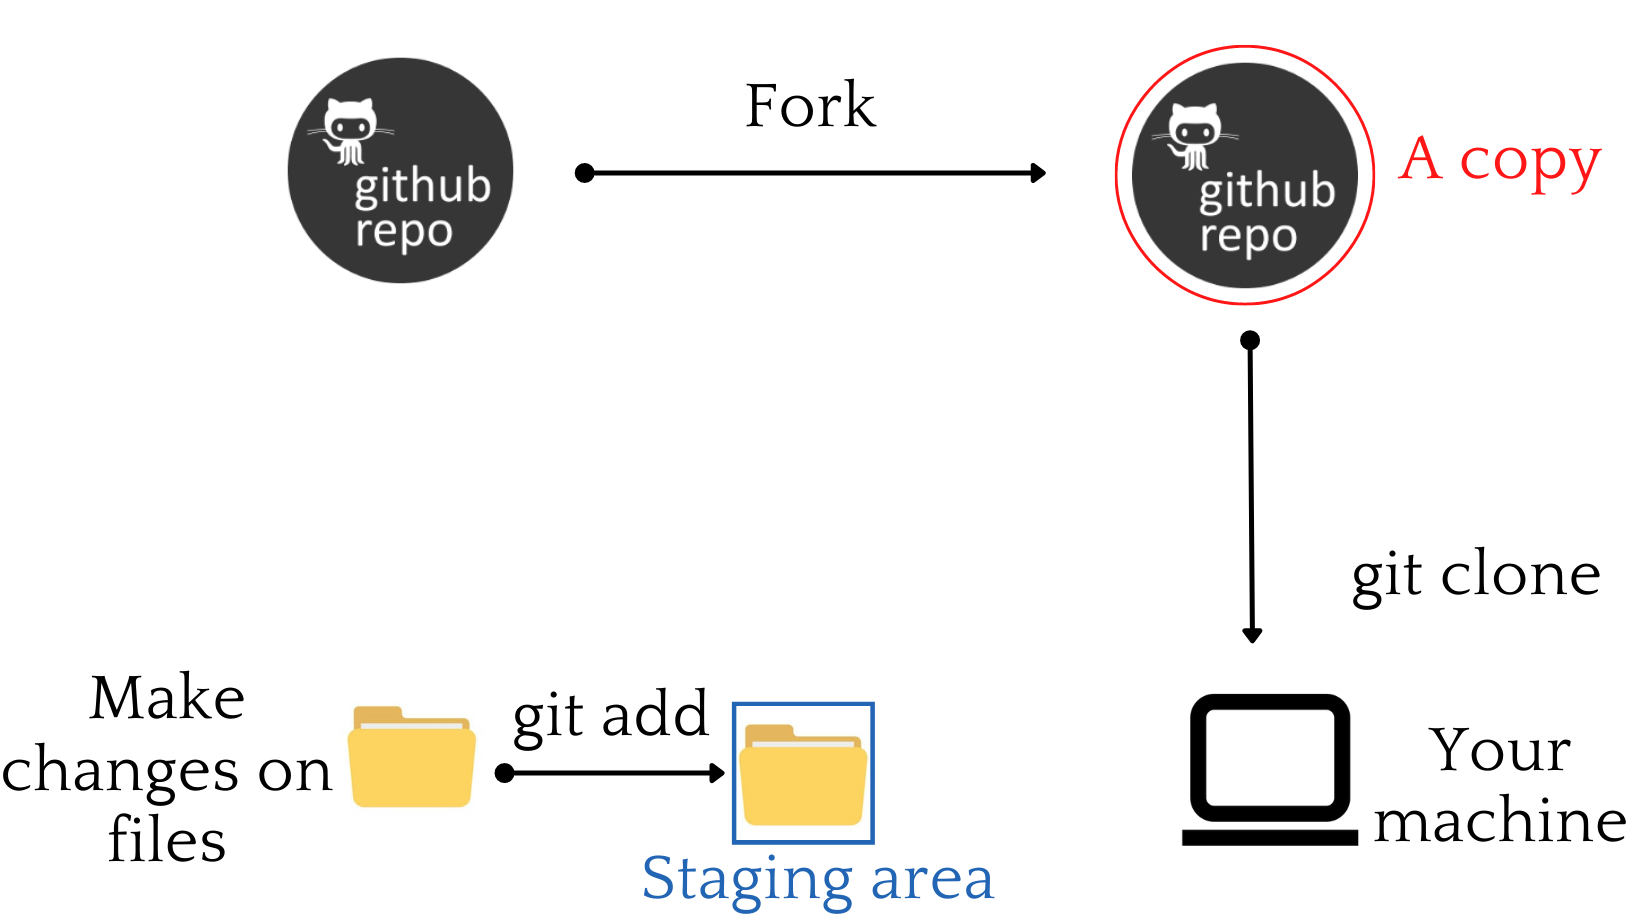
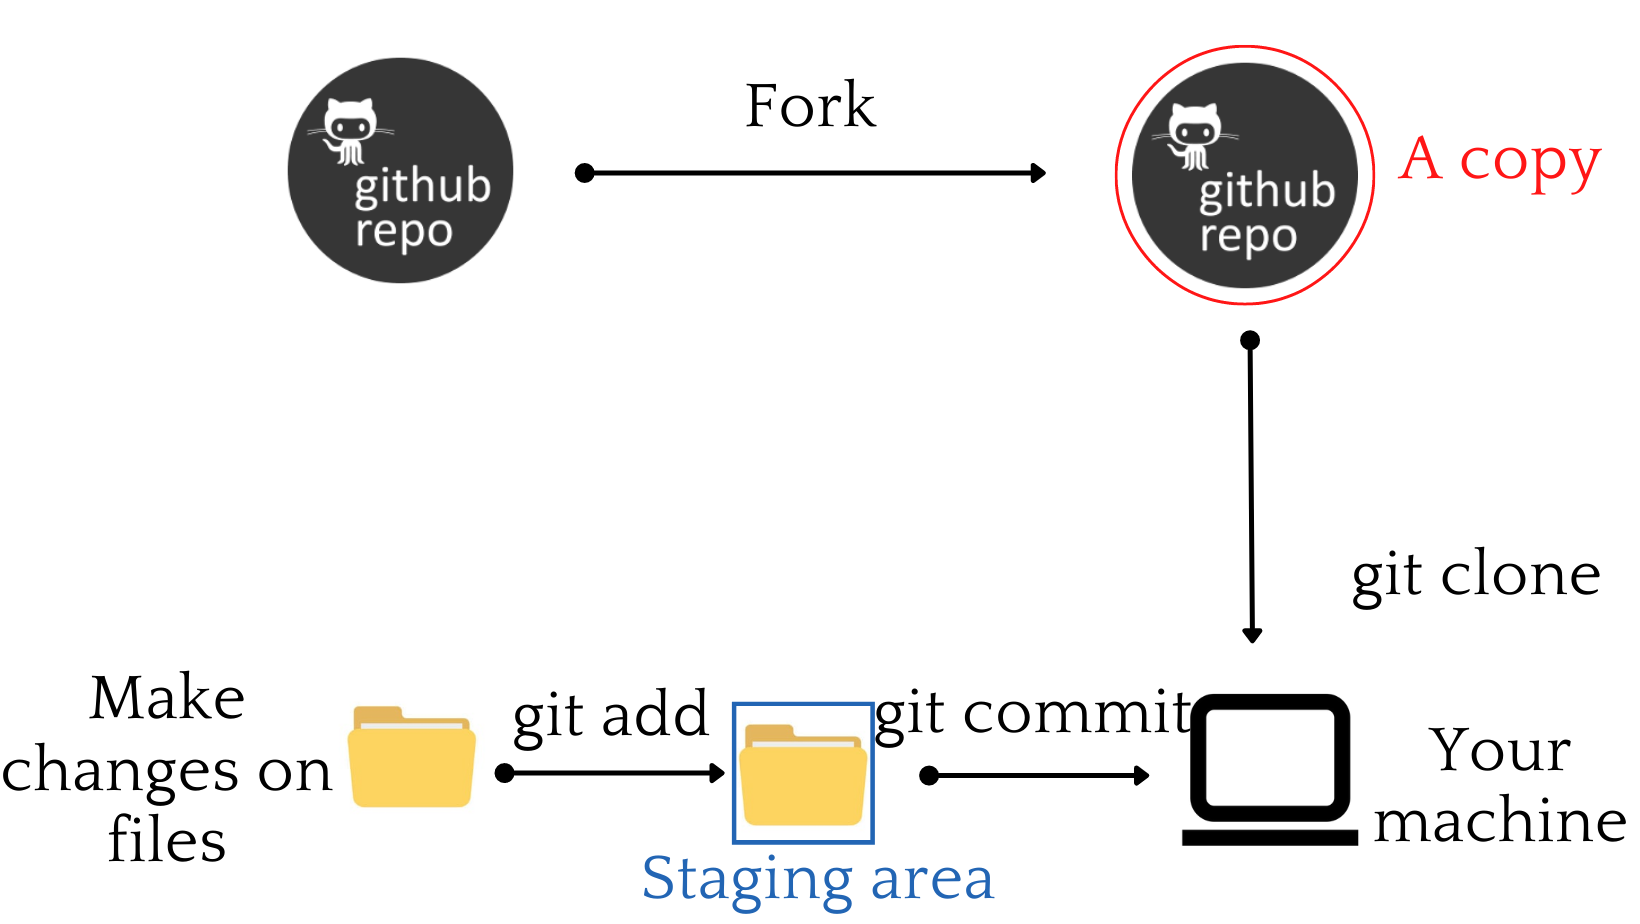
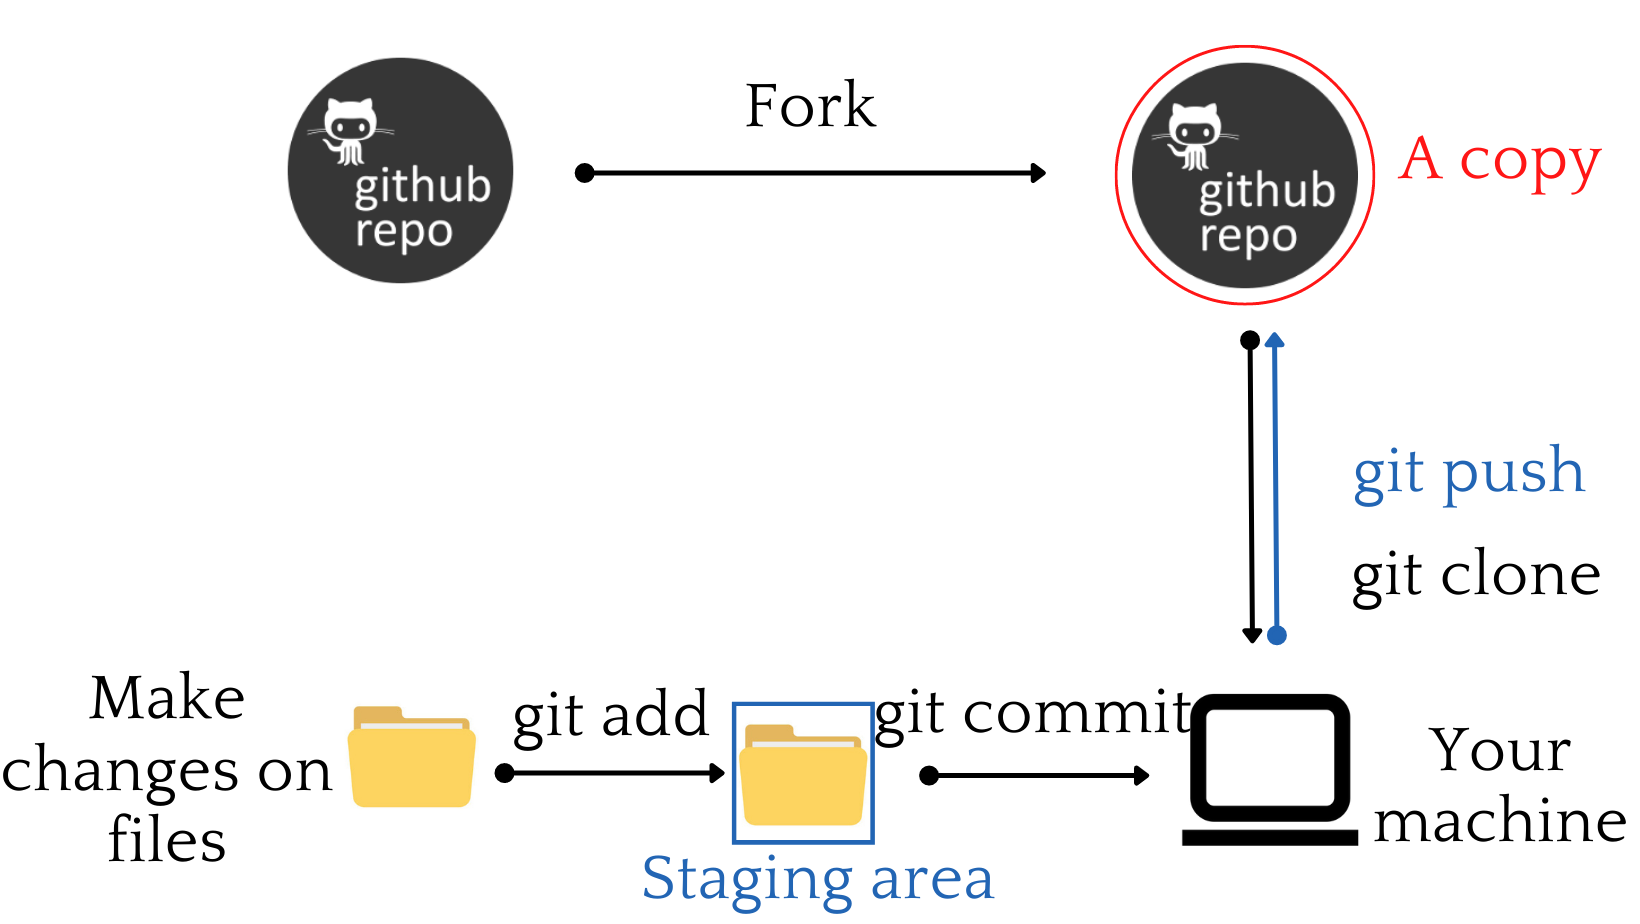
What is Git?
- Git is a software that keeps track of versions of a set of files
- It is local to you; the records are kept on your computer
What is GitHub?

- a hosting service that can keep the records
- it is remote to you, like Dropbox
- GitHub is specifically structured to keep records with Git
GitHub Knowledge Base

GitHub Knowledge Base
GitHub Knowledge Base
GitHub Knowledge Base
GitHub Knowledge Base
GitHub Knowledge Base
GitHub Knowledge Base
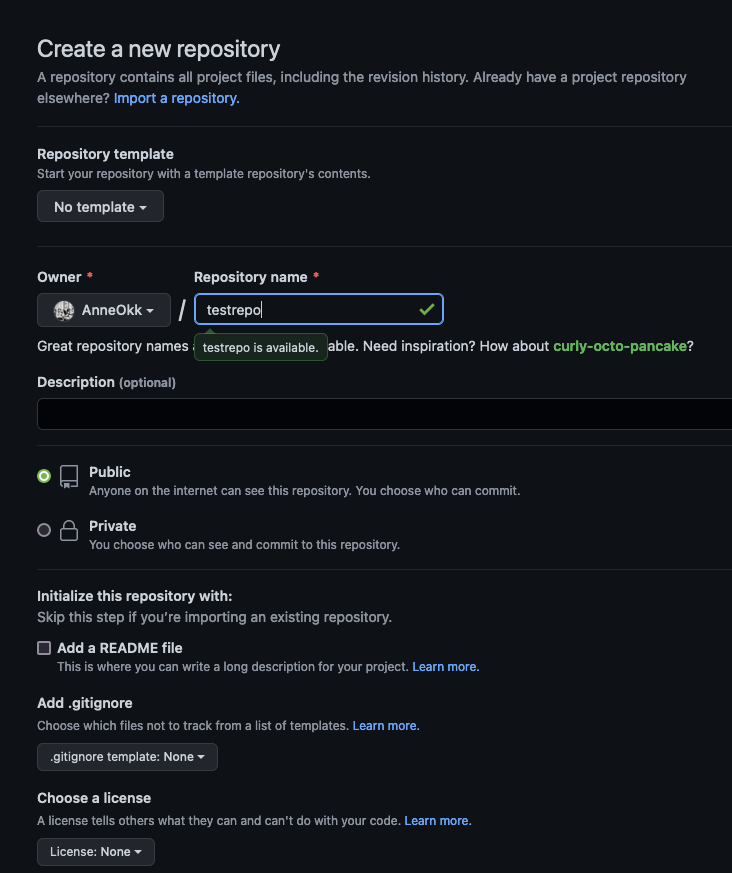
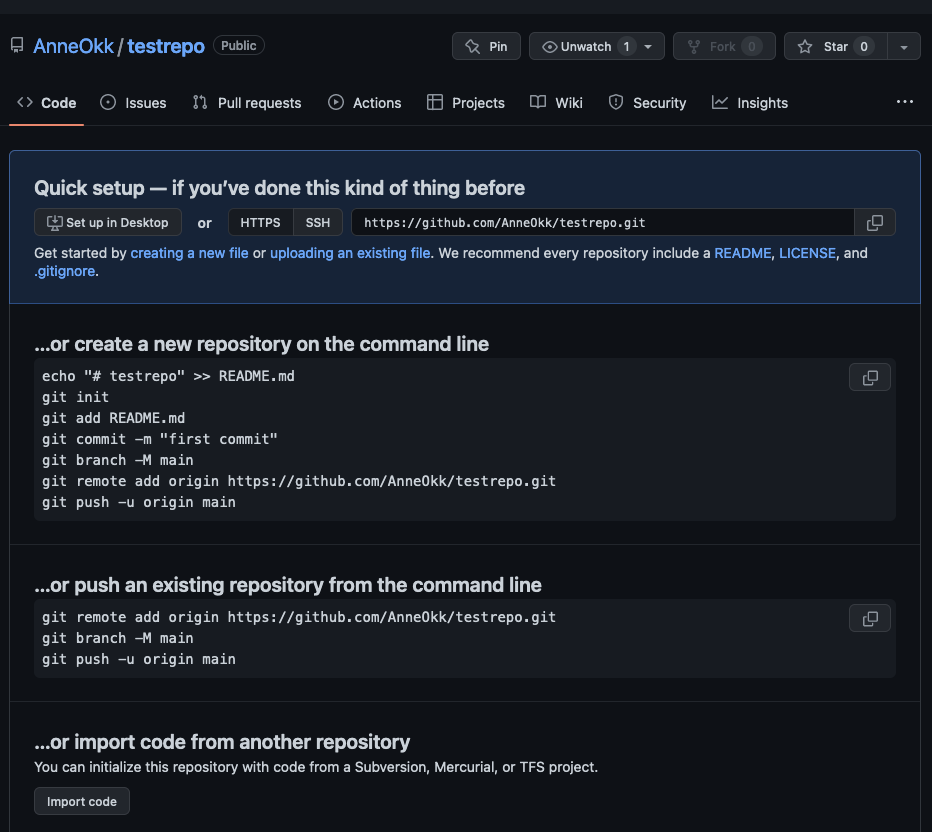
On GitHub
- Go to GitHub and create a new repository
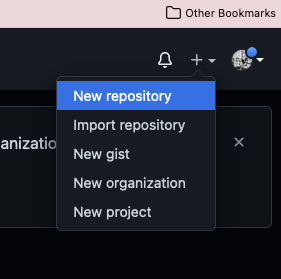
- Fill in some info, create a public repository
![]()
- Follow the steps in Option 1: “…create a new repository on the command line”
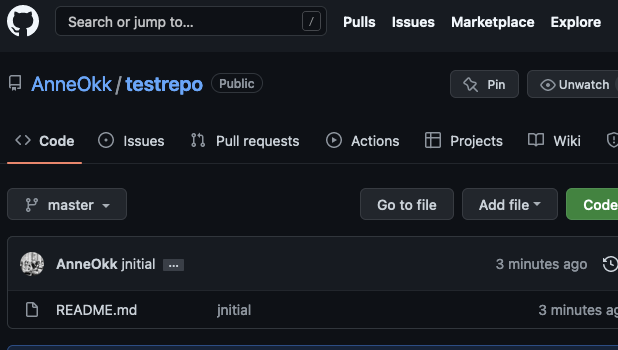
🎈 The pushed files should appear in your GitHub repository 🎈
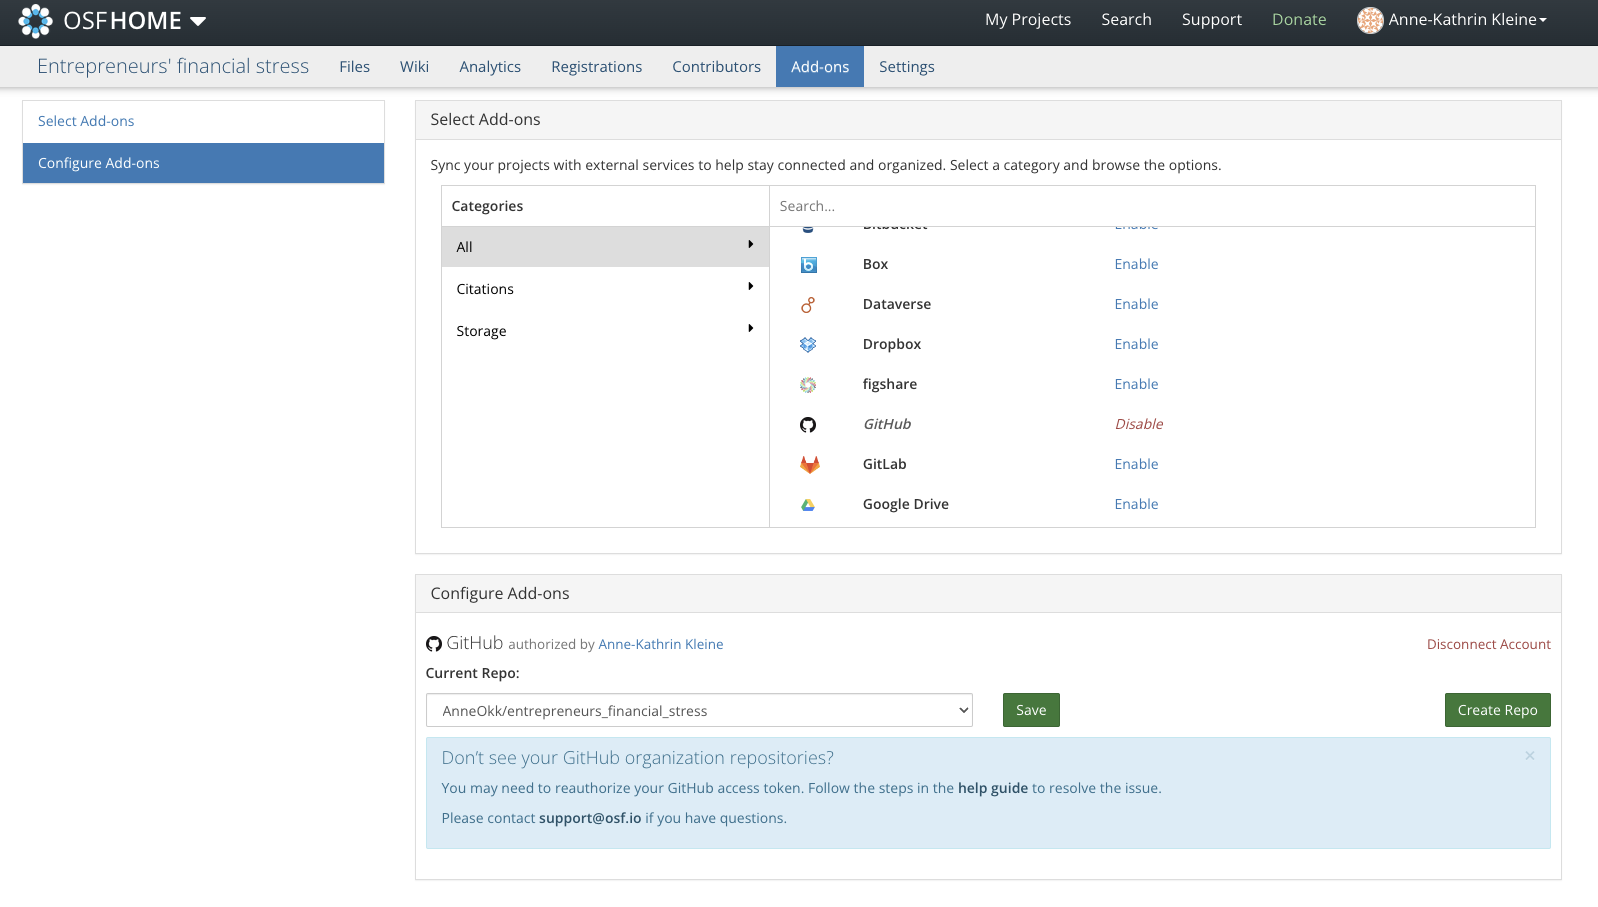
Connecting osf to GitHub
- Create your osf project
- Enable GitHub in Add-ons
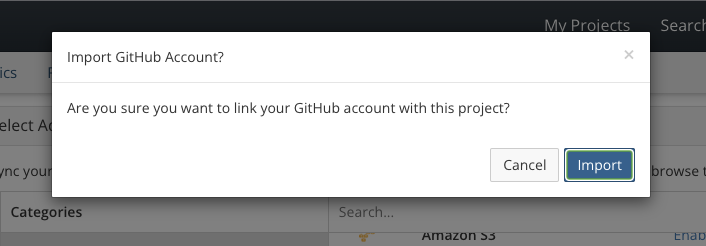
- Import GitHub Account
4. Select Repo
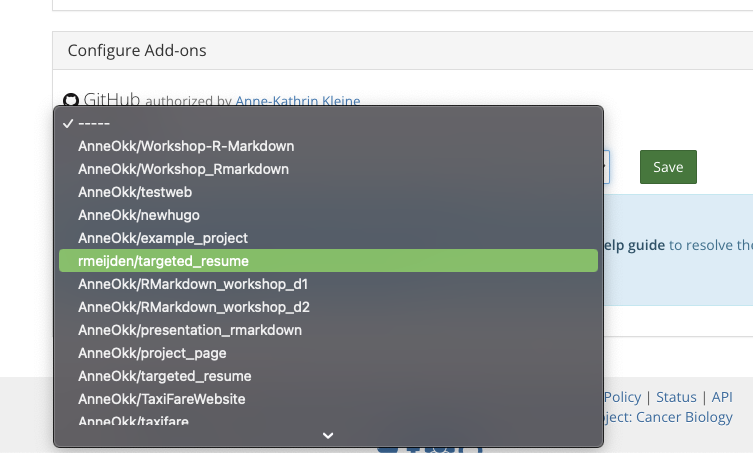
🎊 Yey, you’re all set to connect your GitHub content to osf! 🎊
…And there is so much more!

You will get the chance to work on your own data analysis project
For this, you will have ~ 30 minutes to prepare the folder structure tomorrow
You may use either the example material or work on your own projects
![]()